
Previously I have written another tutorial on how to use Photoshop pen tool to remove background from product image
and now I am thinking it is extremely frustrating when you have a
picture that portrays an image with lots of flowing hair and you want to
change or remove background from hair image. Photoshop enables one to use an image masking technique to remove the background from your image. The following is my new step by step process how to accomplish the background removal technique from the hair image.
Trying to remove all this hair can be a nightmare. So here is what you need to do. Using the background eraser tool makes life a little bit easier. So let’s get straight into it.
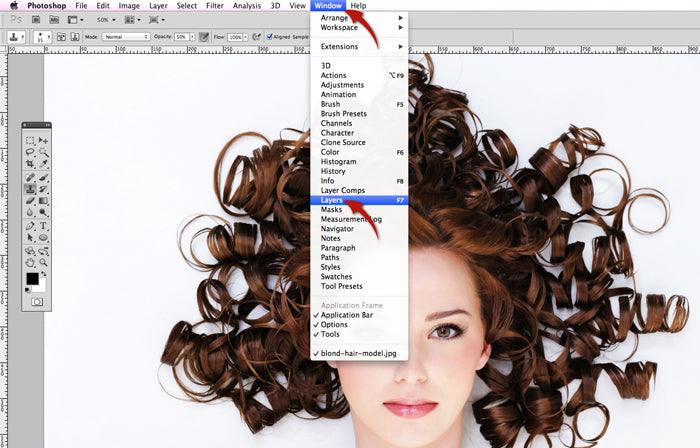
1. First thing we want to do is remove some of the background. So you need to open the layer palette (Windows>Layers).
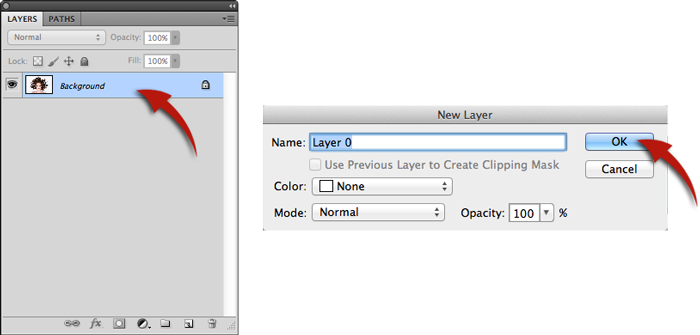
2. You might need to unlock it (just double click on the layer until it opens). A little box will come up and just press OK and you are good.
3. Next, you will be using the eraser tool to delete some of the background (mine happens to be white). By removing most of the background color, it saves you time.

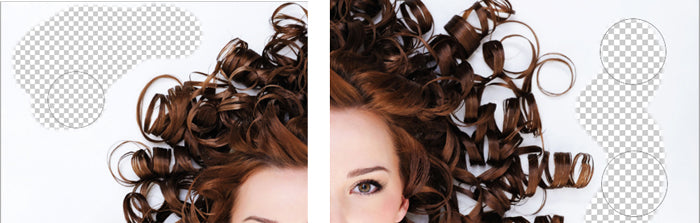
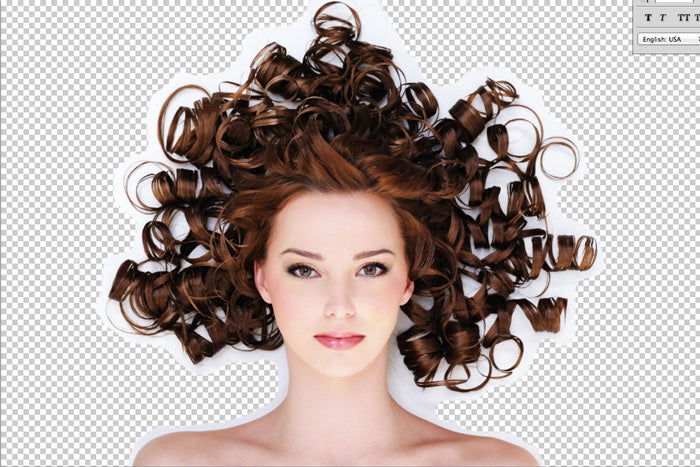
4. You will go all the way around the image on both sides as close as you can to the hair, it should appear checkered.
5. Next you will want to add a new layer, go the bottom right hand side and click on new layer.

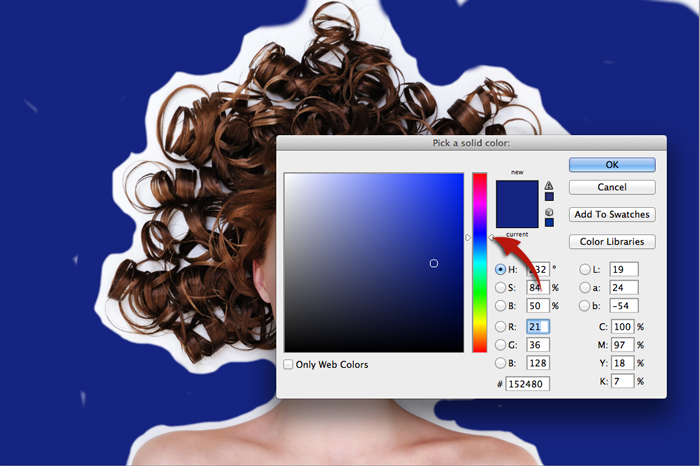
6. Then go back to the bottom and choose icon adjustments. Left click on that and choose solid color.
7. When the color comes up, I would
choose a dark color, dark blue etc. It’s so I can see if there are any
white bits left in background.
8. Now we are going to get rid of all that white and make it whatever color we want.

9. Now go back to the background eraser tool to the left hand side of the page.

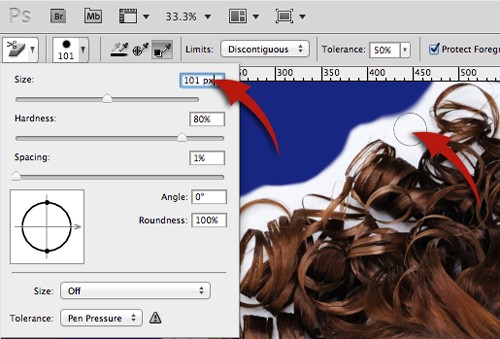
10. Go to the top of the page to the
brush size, where the options are set. I have it at 100 but you can use
smaller if you want, (ie.70), and use a soft edge. Then go just to the
right and click on sample 1, the middle eyedropper.
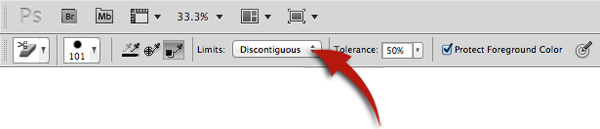
11. The limits just to the right of that are set at discontinuous.
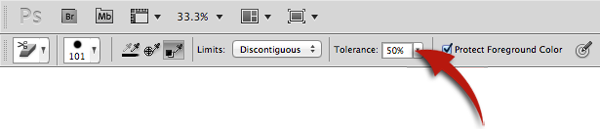
12. Next to that is tolerance, set a 50%. Then protect foreground color follows make sure to check that.
13. Now you will click on a white bit
with the left mouse button held down, clicking on the white bit and go
in and all around the hair as you continue to hold down the mouse. You
are using sampling 1, so it is the dark blue color you originally chose.

14. Continue all the way around, don’t get too far into the hair just the white areas.

15. You should have taken out most of the white except for a tiny white outline around the edge of the hair.

16. Now if you choose to change the color, double click on layer thumbnail of color fill 1 layer and a box will pop up.

17. Maybe you want to try a lighter color; if you do use a lighter color then you would not see the white edging.
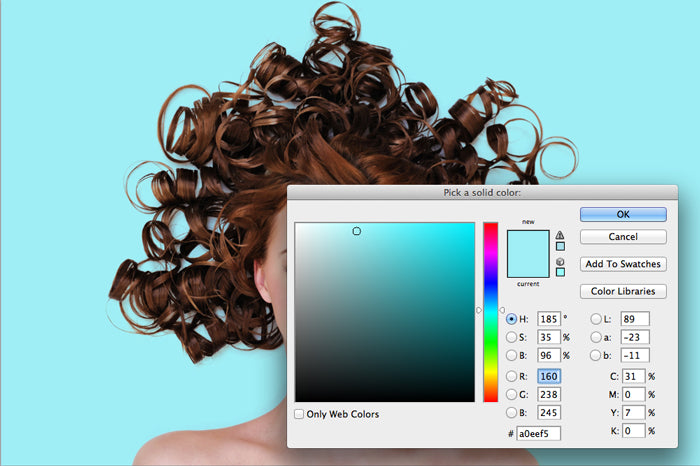
18. However if you use darker colors then you see the white bits at the edge.

19. Go to the left hand side again and select the burn tool (the little hand holding fingers together).
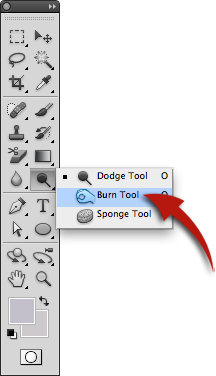
20. Go back to the layer and then at the top where it says range, you select midtones and exposure 100%.

21. Then you use the tool to go over all the edges of the hair, darkening them up, getting rid of some of the white.

22. Now that most of the white edge has been removed, you can use any number of dark background colors, no problem.

If it is finished you can click OK and
you are done. If the background were multi colored it would be more
difficult. But there you have it.
This is a tutorial on how to remove background around hair using Photoshop CS5, but other versions will work too. Also you can read my tutorial on how to remove background from product image using Photoshop.
So there you have it, a straightforward method of removing background from the Hair Image. This simple process can also be used to add different backgrounds to your image as well.


0 comments:
Post a Comment